How To Draw a beer bottle step by step: Do you like to drink beer? Many people do, and in fact, it is one of the most popular beverages in the world. But many don’t know how to draw a beer bottle step by step just from their imagination.
In this blog post, we will teach you how to draw a beer bottle step by step. This is a fun activity that anyone can do, regardless of their artistic ability. So grab a piece of paper and some pencils, and let’s get started to know how to draw a beer bottle step by step.
How To Draw A Beer Bottle Step By Step Guide
Here we have provided you with the steps on how to draw a beer bottle step by step. Follow The Steps And Draw Your Beer Bottle Now!
Sketching Out A Basic Outline
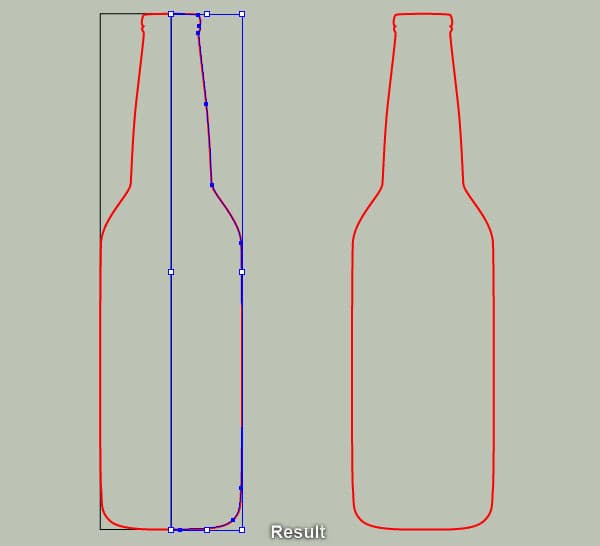
Start drawing your beer bottle by sketching out a basic outline of how you want it to look. This could include things like how high up off the ground should be or how wide across at its widest part. Once done, erase any unnecessary lines from earlier steps until only those needed remain visible on paper (and maybe even then!).
Add Details To The Outline
Once your outline is complete, begin adding details such as label design elements and text. Make sure they are to scale with how big the bottle will be when finished so that everything fits properly later on! If not sure how this works just yet then practice drawing something smaller first like an apple or pencil case before trying again at the beer bottle.
Shade The Areas Of Your Drawing
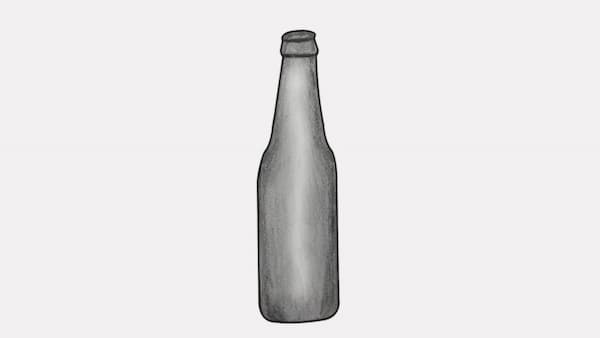
Start shading in the areas of your drawing that will be darker in coloration, such as the glass on the bottle and any text or designs you’ve added. If needed use different shades of a pencil to get a more realistic look (light green for grass, light blue for the sky, etc.).
Final Touches
Lastly, add any final touches to your drawing such as reflections off the glass or highlights on the metal around the top. If you’re happy with how everything looks then congratulations! You’ve just drawn a beer bottle like a pro!
Now that you know how to draw a beer bottle step by step, why not give it a try? You can start off with a pencil and paper, or you could use some markers and colored pens for a more professional look.
Also, know how many calories in one bud light beer by clicking on the link.
How To Draw A Beer Bottle Step by Step – For Beginners
Are you one of those people who can draw a perfect picture from their imagination, or are you struggling to make the simplest shapes? If you’re in the second category, don’t worry – you’re not alone.
In fact, many people find it difficult to learn how to draw. But with a little bit of practice and some helpful instructions, anyone your drawing skills not that good yet? Well, now it’s time to learn how to draw a beer bottle step by step!
First Step To Draw A Beer Bottle
Start off by drawing an oval shape for the top of your beer bottle. Then add another line from the left side at the bottom center point and up towards the right edge so there are two lines that meet one another but don’t cross over each other or touch in any way (this will make sense later).
Draw Three Ovals
Draw three more ovals on top of each other, starting at the bottom and working your way up. Then draw lines between them so they look like they’re connected but aren’t actually touching one another yet – this creates space between all four shapes! And don’t forget about how the lines from Step One should look – they need to meet each other at the top but not cross over.
Draw The Front Part Of Beer
Draw a curved line coming down from the top of your beer bottle and going towards the left side. This will be the front part of your bottle, so make sure it’s nicely rounded off. Next, draw another line coming down from the top of your beer bottle and going towards the right side. This will be how you draw a beer bottle step by step – just remember how all these lines intersect each other but don’t cross over or touch anywhere else!
Create The Body Of The Beer
Draw three ovals on top of one another, starting at the top and working your way down. This will create the body of your beer bottle, and you can make it as wide or thin as you want. Just remember to keep in mind how big everything else needs to be so it all fits together nicely!
Finalize The Structure Of Beer
Draw a curved line at the bottom of each oval from Step Four, making sure that they don’t cross over or touch in any way. This will create how your beer bottle is going to look when it’s finished (which should be taller than the rest of them). Don’t forget how all these lines intersect each other but don’t actually meet one another anywhere else!
Create The Lable Of Beer Bottle
Draw three ovals on top of one another, starting at the top and working your way down. This will create the label for your beer bottle, and you can make it as wide or thin as you want. Just remember to keep in mind how big everything else needs to be so it all fits together nicely!
Add Final Touches
Last but not least, add any final touches or details to how your beer bottle looks. You can draw lines on the label, a zipper running along the top of it and/or around the bottom edge; how about some bubbles inside the glass?
That’s it! This is how to draw a beer bottle step by step.
Conclusion
I hope the article on how to draw a beer bottle step by step guide was helpful, and that you now feel confident enough to give it a try yourself! Just remember to take your time, be patient and have fun with it. The more you practice, the better your drawings will become. So what are you waiting for? Get creative and start drawing today! Visit Chillbeer.net for more related posts.