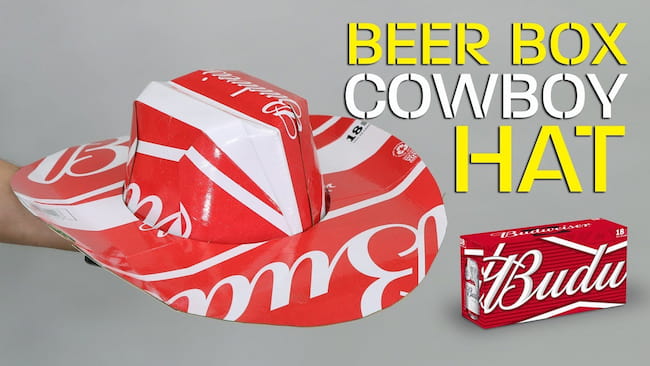
Do you love beer? Do you love hats? Well, then today is your lucky day! We are going to show you how to make beer box hats. If you are looking for a fun and easy craft project, then look no further than beer box hats!
This project is perfect for beginners, and it’s a great way to use up any extra cardboard boxes lying around your house. All you need are some empty beer boxes, some scissors, and some tape. We will show you how to turn those empty beer boxes into stylish hats in no time.
In this tutorial, we will show you how to make beer box hats in just a few simple steps. This is a really fun and easy craft project that anyone can do. So what are you waiting for? Let’s get started!
How To Make Beer Box Hats
A beer box hat is a great way to show off your love of beer, and they make great gifts too! They are also really easy and inexpensive to make. Before we see the procedure, we have to know the supplies we need.
Supplies Needed
If you want to know how to make beer box hats, you’ll need the following supplies:
- 3 beer or soda cartons
- Craft knife
- Ruler
- Scissors
- Scrap paper
- Hot glue & gun
- Spray adhesive
- Tape
- Marker
- 1 headband (optional)
Also, See:
Instructions To Make Beer Box Hats
Now that we have all of our supplies, we can start making our hats! Follow the simple steps below to make beer box hats and you’ll have your very own beer box hat in no time.
Step One: Take a printout of the given hat template or you can draw your own hat template on scrap paper.
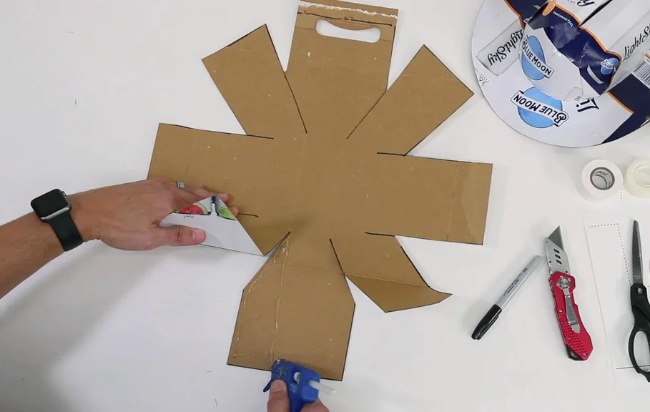
Step Two: Now, take the three beer cartons and cut out the bottom of each one using a craft knife. Make sure to be extra careful while doing this.
Step Three: Next, use a ruler to measure and mark out two strips on each side of the carton. These strips should be about an inch wide and 12 inches long. Cut out these strips with your scissors.
Step Four: Once you have all of your strips cut out, it’s time to start assembly! Take two of the strips and glue them together at the long edges using hot glue. Repeat this step until all of the strips are glued together.
Step Five: Now that all of your strips are glued together, it’s time to start shaping your hat. First, use your scissors to round off the corners of one end of the strip. Then, begin rolling the strip up from the other end until it forms a cylinder shape.
Step Six: Once you have formed a cylinder, use hot glue to secure the end shut. Now that your hat base is complete, it’s time to start decorating!
Step Seven: You can use whatever materials you like to decorate your beer box hats. We used some scrap paper and spray adhesive to add a little bit of color. But feel free to get creative and use whatever you like!
Step Eight: Once you are happy with your decoration, it’s time to put the finishing touches on your hat. Take the remaining strip of cardboard and cut it into 12 equal pieces. These will be used to create the brim of your hat.
Step Nine: To attach the brim to your hat, first measure and mark out 12 equally spaced dots around the edge of the hat. Then, use hot glue to attach a piece of cardboard to each of these dots.
Step Ten: And there you have it! Your very own beer box hat!
Conclusion
We hope you enjoyed this tutorial. If you make your own beer box hats, be sure to share your experience with us. Now that you know how to make beer box hats, what are you waiting for? Get started today and show off your new hat at your next party! Keep visiting Chill Beer for more useful guides like this.